|
||
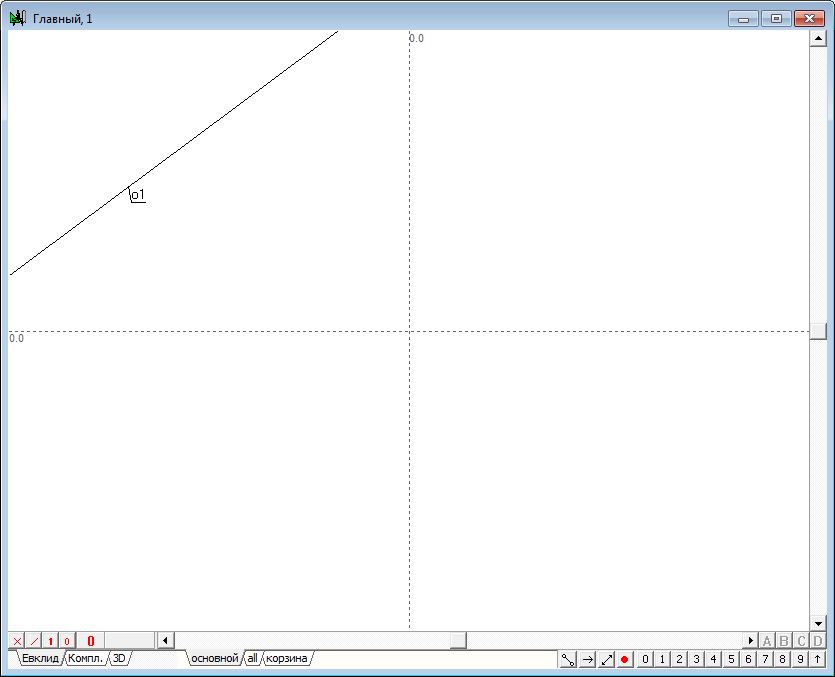
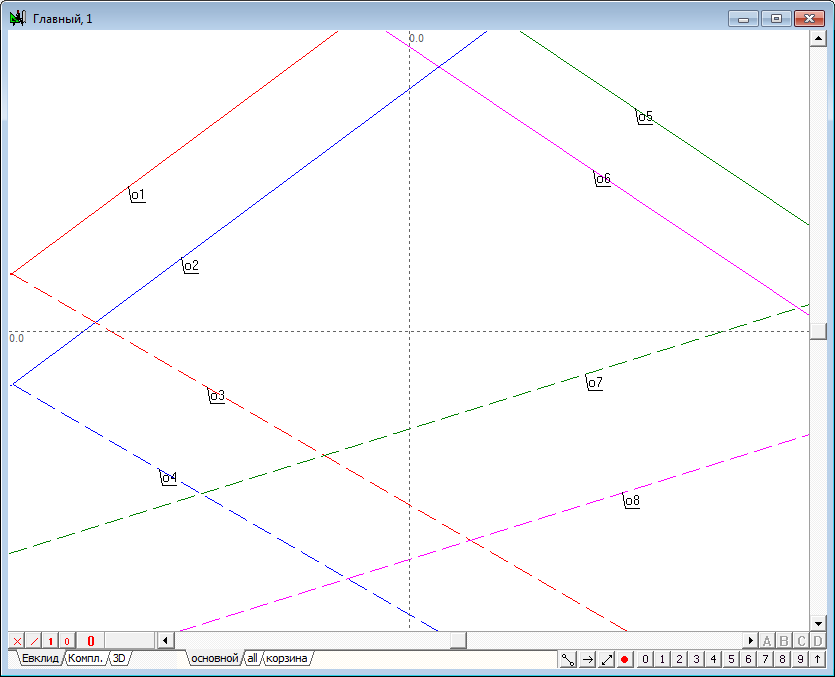
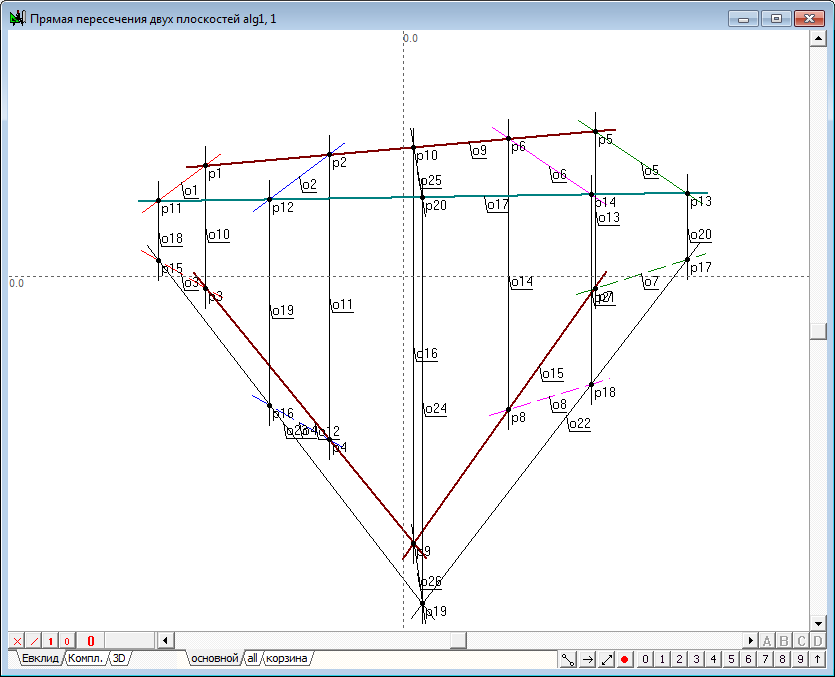
| 1 | Solve the problem of intersection of two planes and make it as an independent algorithm, which can be used as a procedure. Boot the system Simplex and create a new project (Ctrl+N). On the screen it appears to implement the algorithm with the name of the main. Leave this window blank and create a new algorithm, which realize the task. Use the keyboard command Ctrl+Alt+N to open the window to formate the new algorithm automatically named as alg1. Define a first plane, a pair of parallel lines. To do this use a Free line tool and draw the first projection of first line of the first plane o1. |
|
Рис. 1 |
||
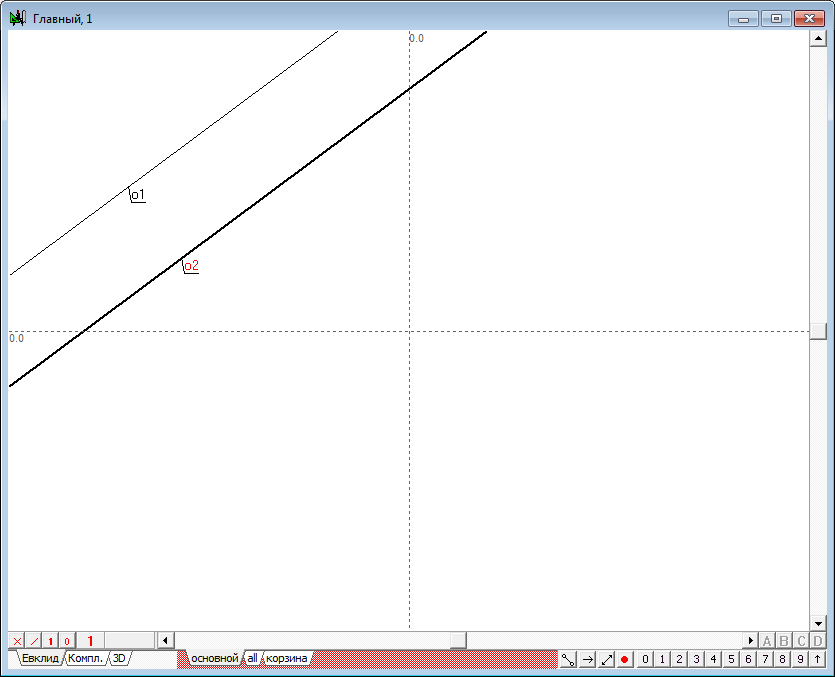
| 2 | To construct the first projection of the second straight plane, select the first line, then shift the cursor on some distance from the selected straight line and press on the keyboard with Latin character o. This action will result in line o2, parallel to the line o1. | |
Рис. 2 |
||
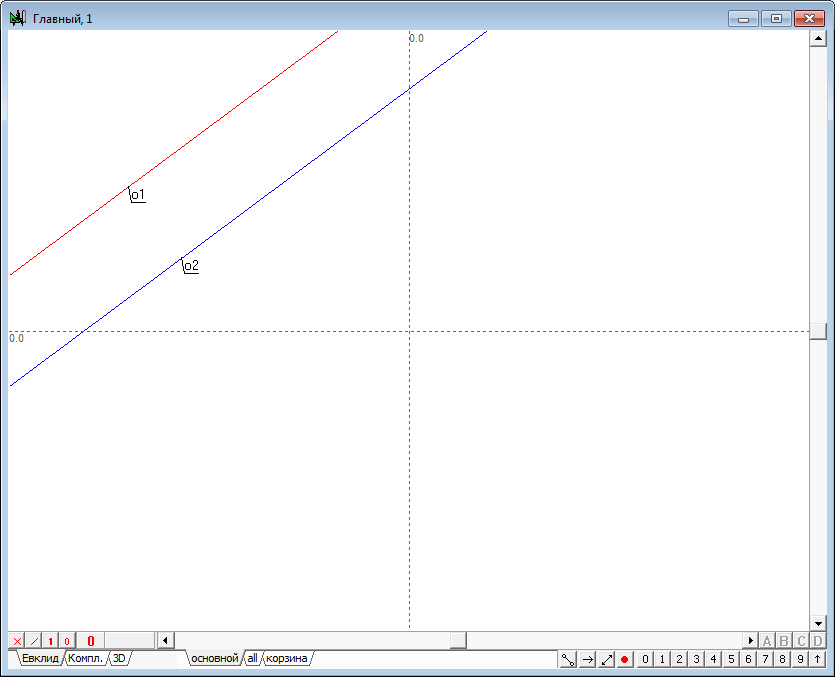
| 3 | It would be convenient to distinguish one line from another, if you change the color of their display. Let o1 video will be marked in red and the line o2 - in blue. | |
Рис. 3 |
||
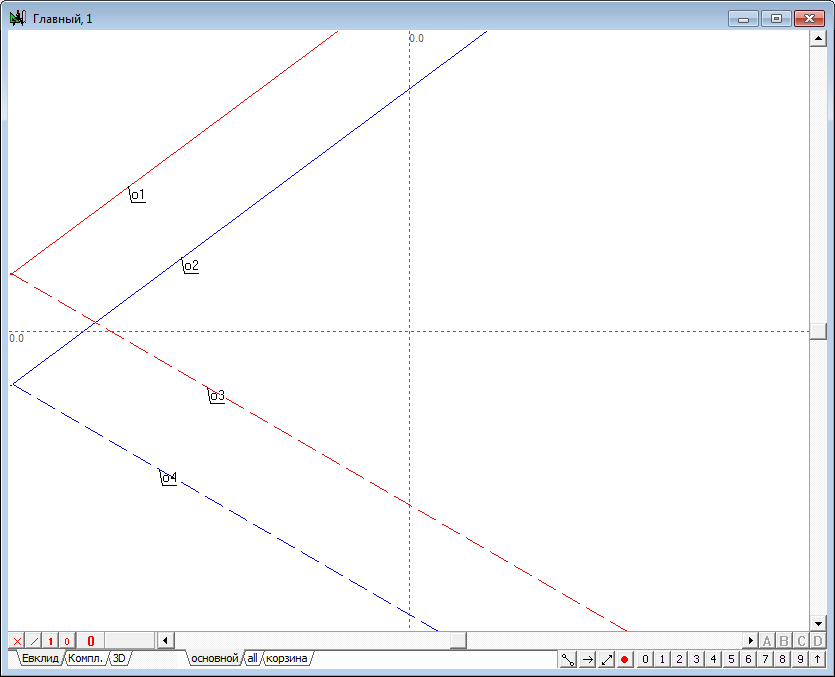
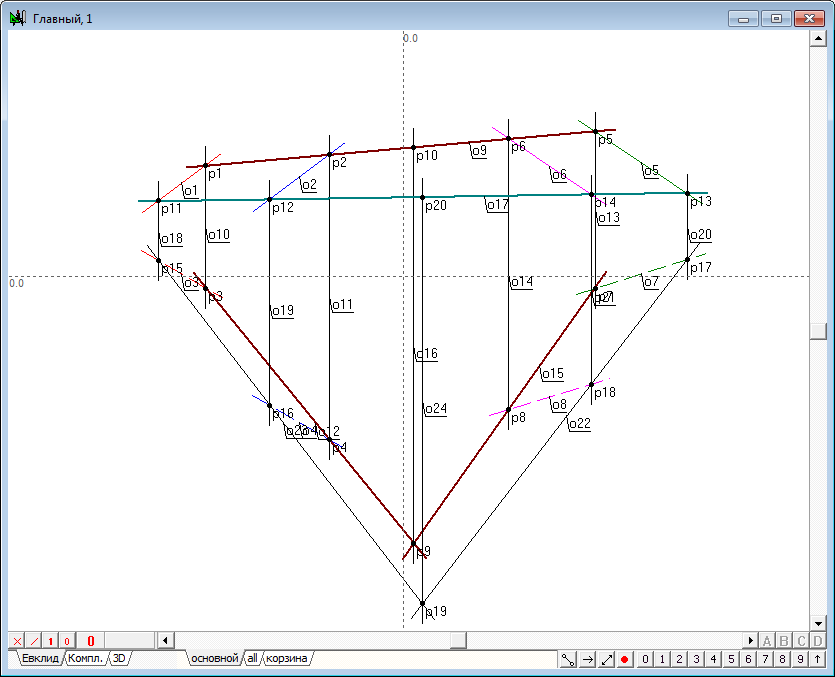
| 4 | Similarly construct the second projections of lines, also noting their respective colors. In addition, in order to distinguish the first projection of lines, which specifies the plane from the second projection, change the drawing style of the last to the dashed representation. | |
Рис. 4 |
||
| 5 | Now we define the second plane. We act according to the mentioned scheme, but will assign other colors to lines to distinguish the first from the second planes. | |
Рис. 5 |
||
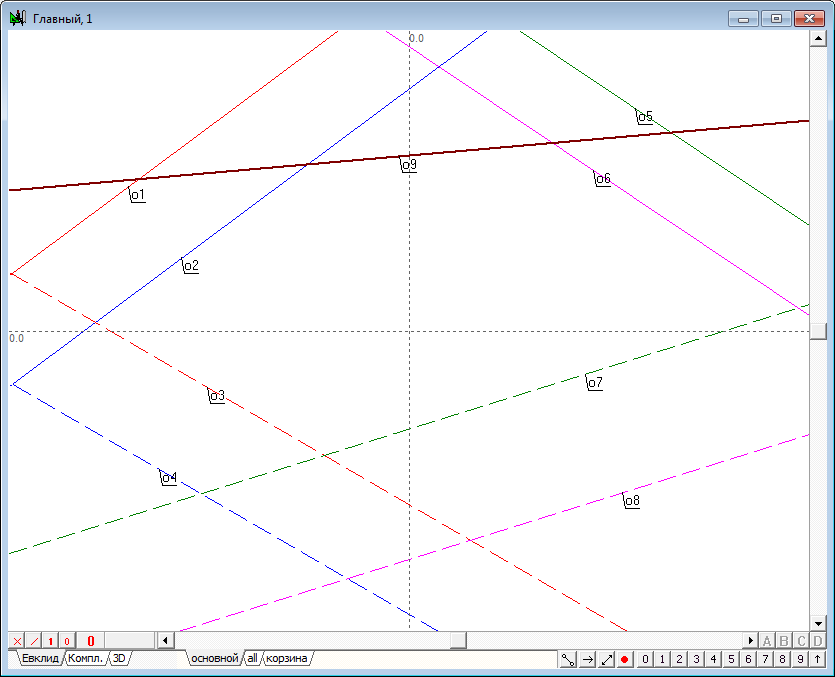
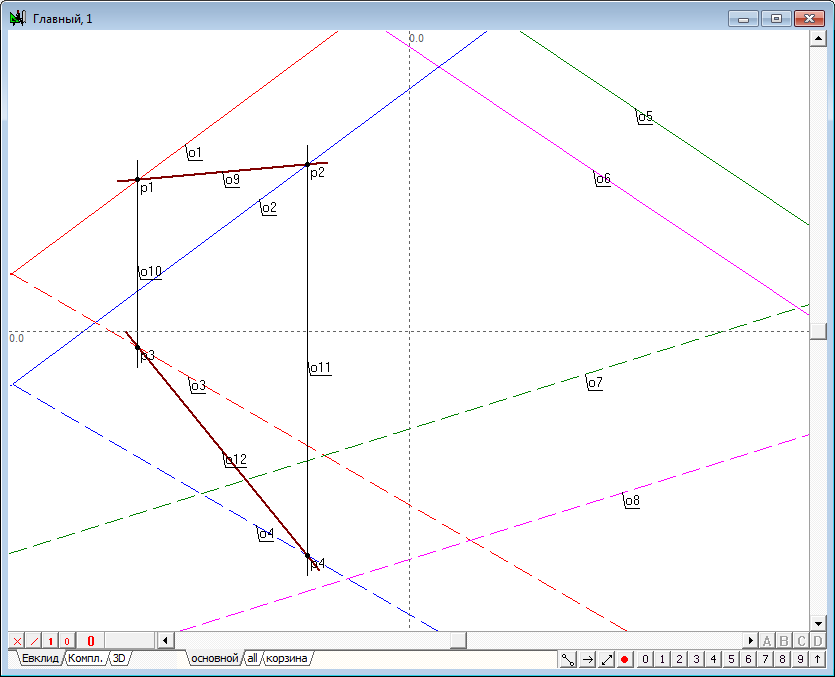
| 6 | Proceed to the solution of the problem. Draw a plane perpendicular to the frontal plane of projections. This plane is in a projecting position, so it will be displayed in the first projection as a straight line. Let it be line o9 . | |
Рис. 6 |
||
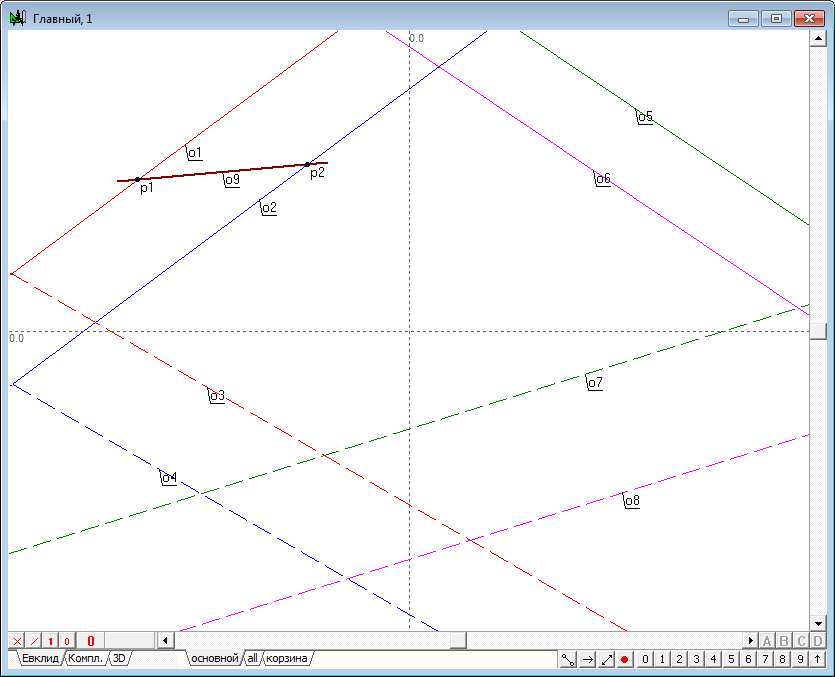
| 7 | The projective plane intersects the first reference plane in a straight line (as in the extended three-dimensional space, any two divergent planes intersect in a straight line). It is clear that the line of intersection belongs to the projective plane, but the plane itself on the projection is depicted by a straight line o9 , therefore, the line of intersection coincides with the line defining the plane, as it is one of all the straight lines belonging to that plane. It is easy to determine the first projection of the points, that are common to the line intersection and line, specifying the first plane. The points p1 and p2 denoting these projections are the result of intersection of a line o9 with straight lines о1 и o2. To construct them, select the corresponding lines and click on the keyboard with Latin character p. | |
Рис. 7 |
||
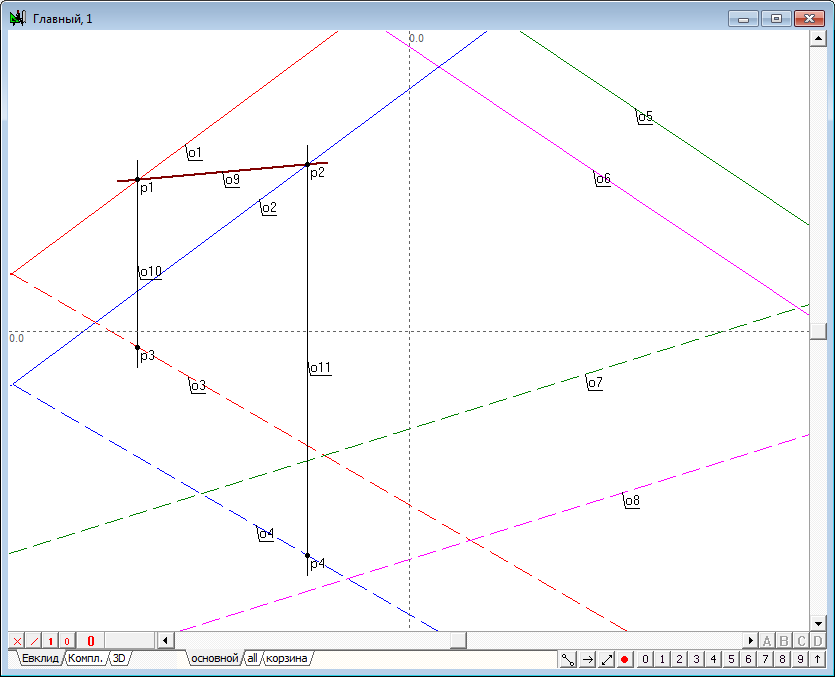
| 8 | Knowing the first projection of points located on the lines defining the first plane, it is easy to determine second projectionsof them, since these projections should be on the second projections of the respective line and lay on the lines of communication passing through the first projection. Therefore, select the point and press on the keyboard with Latin character v for the construction of the vertical lines, and then find the intersection of the obtained straight lines o10,o11, with a corresponding lines o3 and o4 . Of course, you should pay attention to the fact that the projections of the points are located on respective projection lines, it is easy to do, paying attention to the color of drawing objects. | |
Рис. 8 |
||
| 9 | We now know two spatial points through which the line of intersection of the auxiliary projecting plane and the first reference plane is passing by. This means that we can determine a line of intersection using these points. The first projection of this line is already known, and second will pass through the points p3 and p4 . | |
Рис. 9 |
||
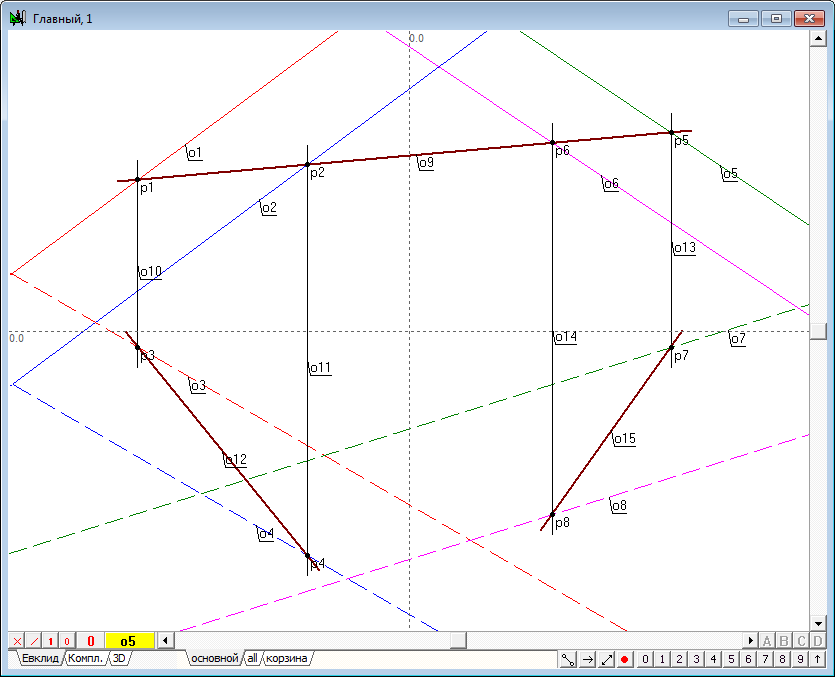
| 10 | It is clear that the same projecting plane intersects the second reference plane. Moreover, the first projection of the line of intersection of these planes is known because it coincides with the straight line defining projecting plane. Acting in exact accordance with the scheme discussed with respect to the first reference plane, we find the second projection o15 lines of intersection of the projecting plane with the second source plane. | |
Рис. 10 |
||
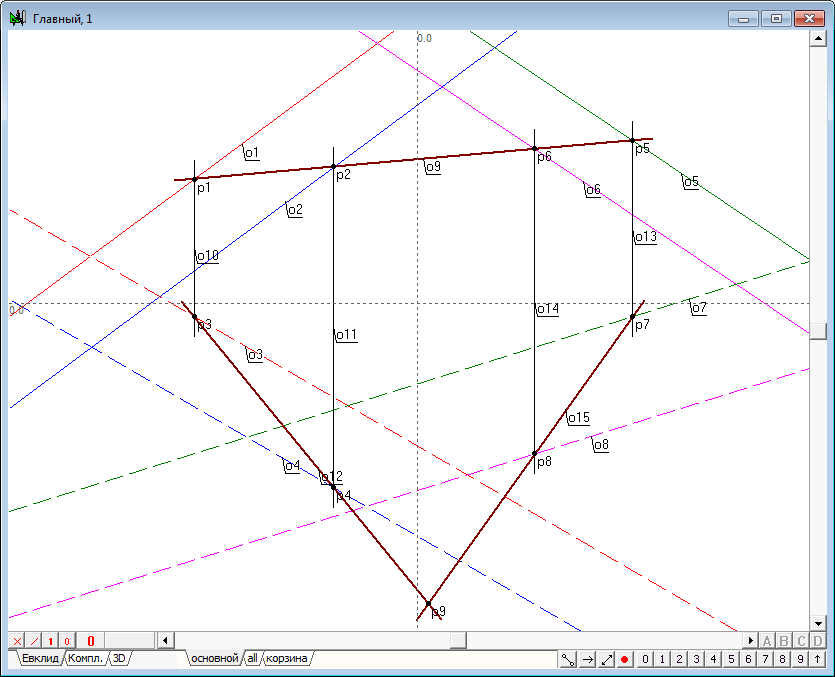
| 11 | The presence of lines o12 and o15 provides us the opportunity of finding the second projection of the point total for all three planes: two original and third - projecting (three planes in space intersect at a point). To identify it cross the straight lines o12 and o15 , highlighting them and pressing on the keyboard with Latin character p (point p9). | |
Рис. 11 |
||
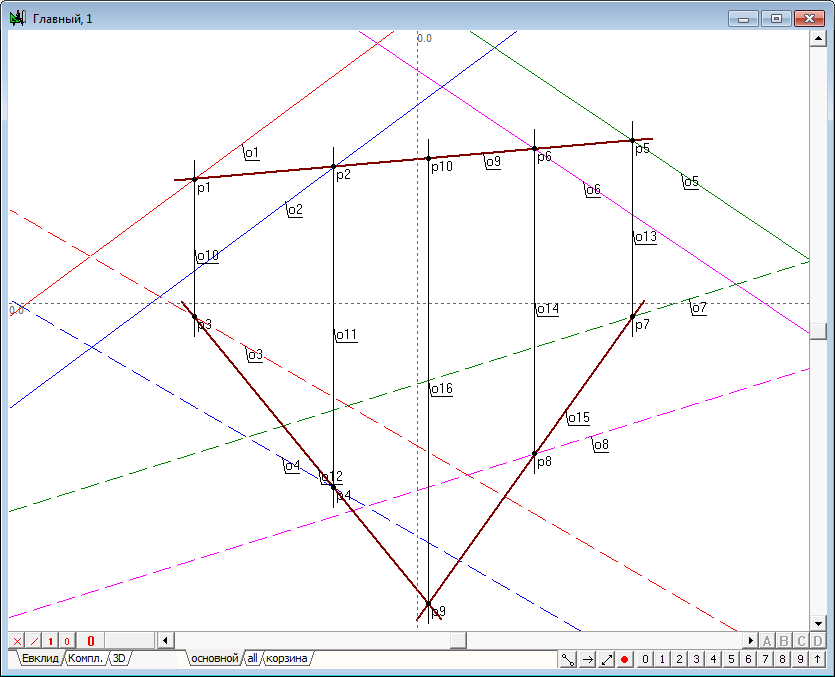
| 12 | It is not difficult to determine the first projection of this point, because it must appear on the communication lines and belong to the projection planes. Since the plane is defined by a straight line o9, then spending o16 vertical line through the point p9, determine its intersection with a straight line o9. The resulting point p10 is the first projection of the required point of intersection of the three planes. | |
Рис. 12 |
||
| 13 |
|
|
Рис. 13 |
||
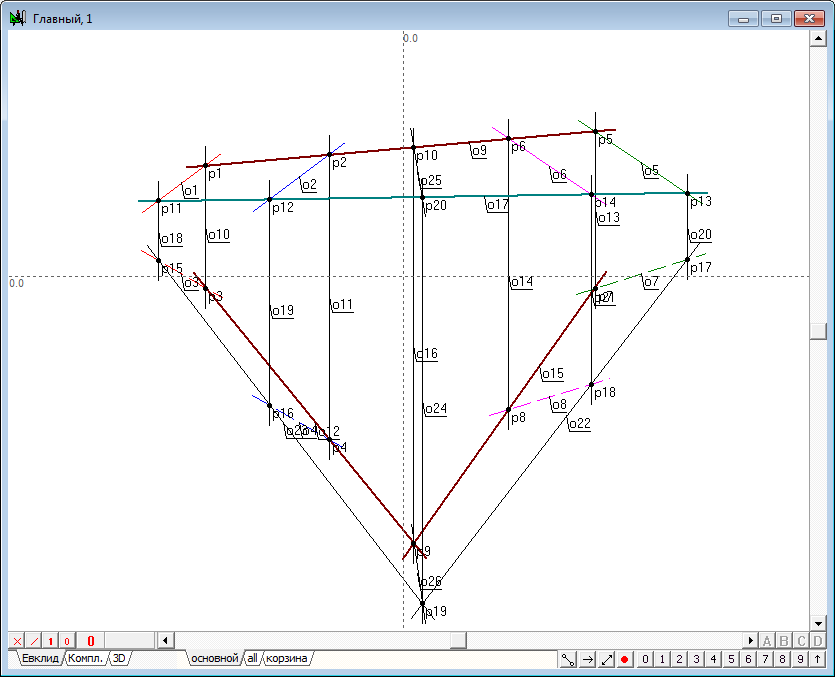
| 14 | We have to draw a straight line through the two points were found that are common to the two original planes, and consequently, a straight line (o25,o26), which are the result of intersection of these planes are determined. | |
Рис. 14 |
||
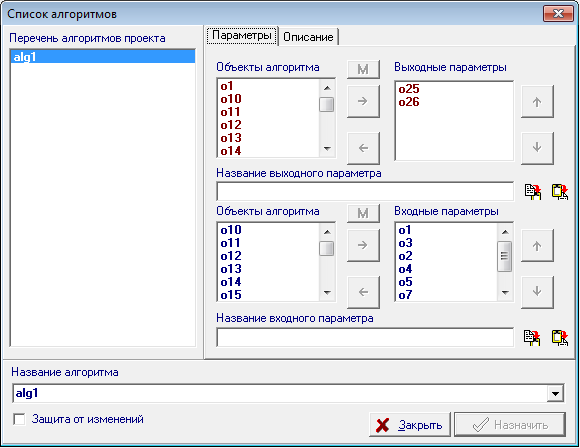
| 15 | Apply now the algorithm as a procedure. Specify and describe the objects that are its input and output parameters, and give the name of this algorithm. The first thing to do is to select in sequence the objects that we want to make the input parameters of the procedure. At this stage you have to decide in what order we are going to set these options, because if you use the procedure as a standalone command, this sequence will need to comply with transferring actual parameters to the procedure. Let the parameters set in the following sequence: - the first projection of the first line of the first plane; Hold down the Shift key, select a needed to specify objects in the following order: o1 , o3 , o2 , o4 , o5 , o7 , o6 , o8 and, by calling right-click context menu, select the item to Assign o1 , o3 , o2 , o4 , o5 , o7 , o6 , o8 the input of the algorithm. Immediately after entering the command the system will display the requests for naming of parameters corresponding to specified objects (their names match just reviewed the list of parameters). If desired, names can be entered during this conversation, but the same action can be performed later, implementing the General setting procedural characteristics of the algorithm. In this case, you should agree with all of the system names corresponding to the names you just selected and assigned as parameters. The second action is related to identification of objects that should be considered as output parameters of the algorithm. In this case the projections of the straight intersection of the planes. Select the objects o25 , o26 and by calling the right-click context menu, select the item to Assign o25 , o26 output of the algorithm. Now, using the context pop-up menu of the window in which was developed an algorithm, call the dialog for its settings, selecting The Algorithm this menu. The screen will display the following dialog box:
|
|
Рис. 15 |
||
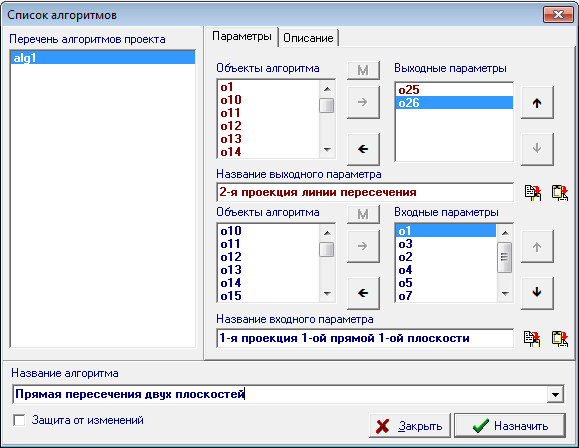
| 16 | Sequentially highlighting items in the lists output parameters and Input parameters specify the names of these parameters. Because the parameter names, there is some commonality, it makes sense to use buttons for inserting text from the panels the name of the output parameter and Name an input parameter to the Clipboard buffer by pressing the button |
|
Рис. 16 |
||
| 17 | After completed assignments window implementation of the algorithm will be as follows: | |
Рис. 17 |
||
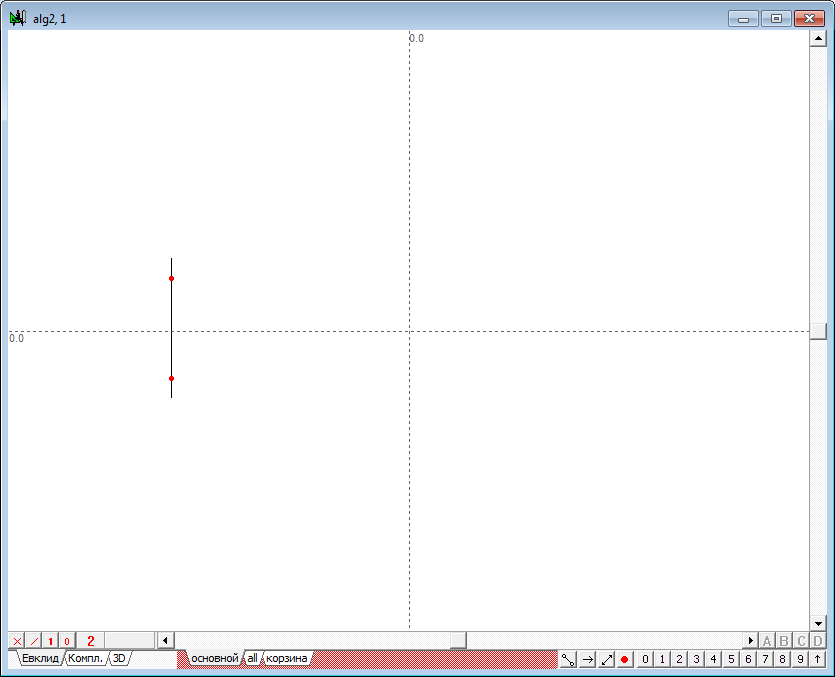
| 18 | To check the performance of the algorithm will create a new algorithm and set it to two arbitrary plane. To do this, press Ctrl+Alt+N that will open the window to form a new algorithm alg2. We define the plane as follows: place the cursor over the free space of the window and press the key with the Latin V (upper case). This action will lead to the formation of a model three-dimensional point - construction of two points and their line bearing, is shown in figure below. |
|
Рис. 18 |
||
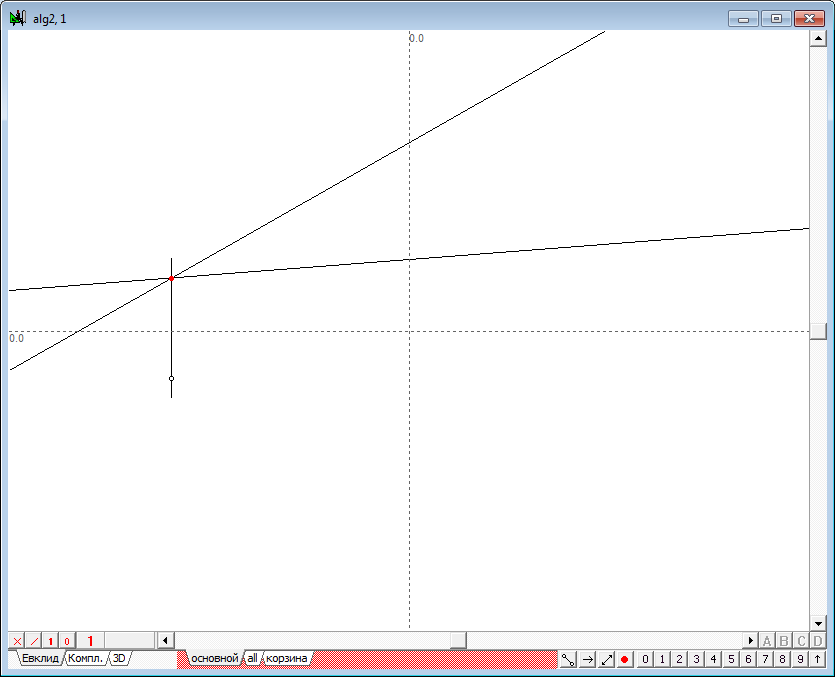
| 19 | Clicking on the left mouse button over a free from the images of the object space of the window will remove the selected points, and then select the top point again. Moving the cursor from a point at some distance, press on the keyboard with the Latin o, which will lead to the construction of a straight line passing through the selected point at an angle to the x-axis, determined by the current cursor position on the screen. Move the cursor a little more and repeat the previous command. The result will be one image below. Performing these actions, we construct the first projection of two intersecting lines, defining the first reference plane in the test algorithm. | |
Рис. 19 |
||
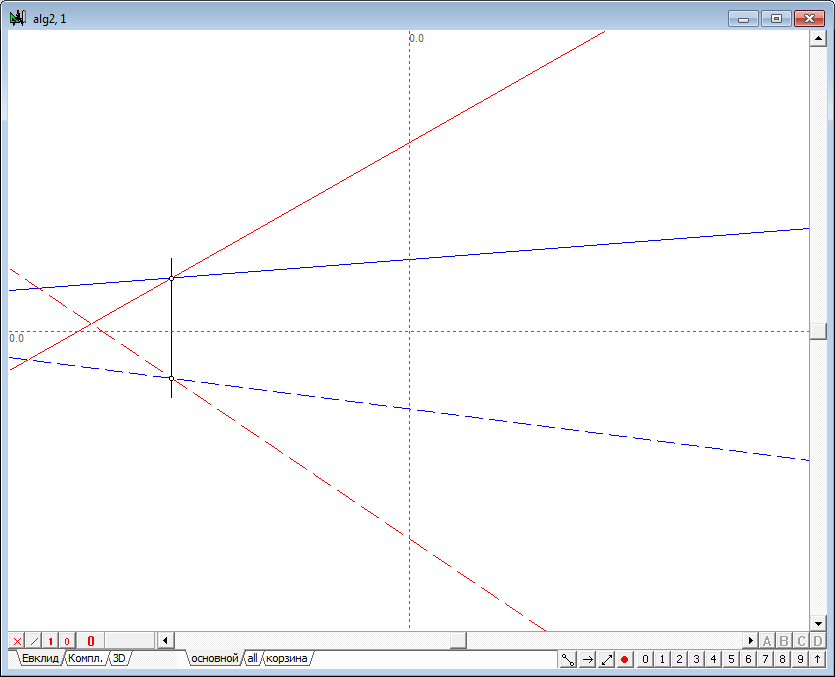
| 20 | Change the color of lines, and then perform the same steps to set the second projection lines, defining the first reference plane. | |
Рис. 20 |
||
| 21 | Similarly we define the second plane. | |
Рис. 21 |
||
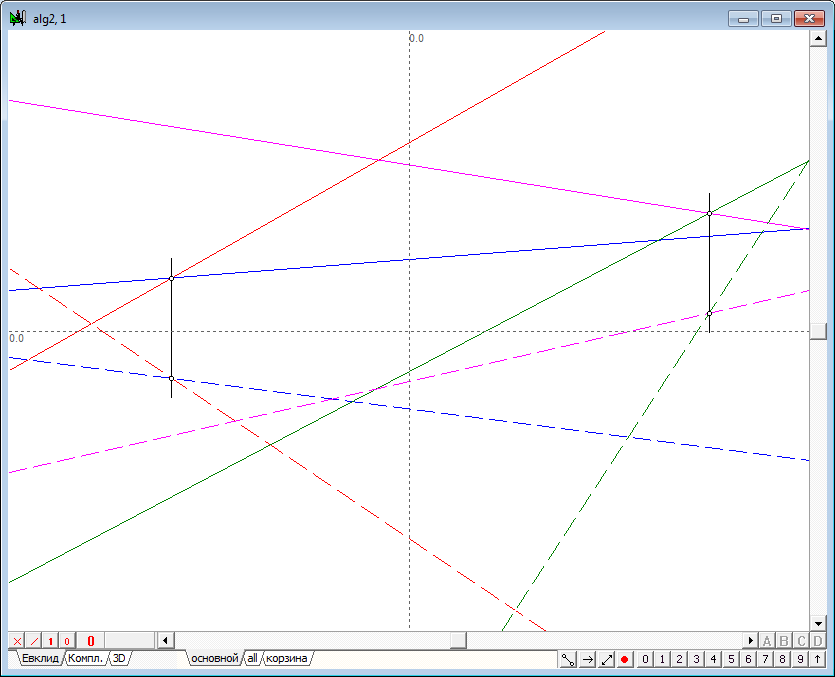
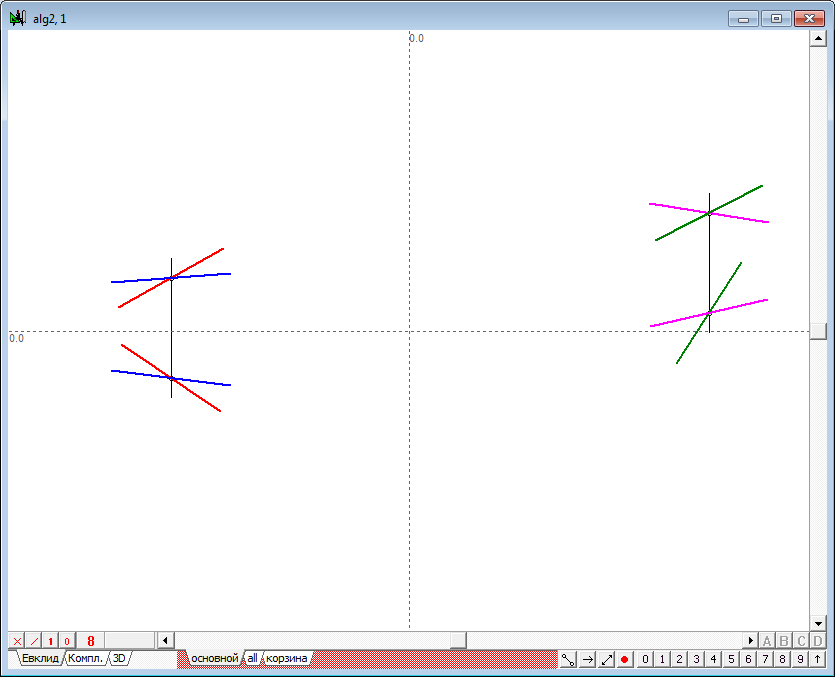
| 22 | The figure shows that built lines quite rapidly fill the working area of the drawing. With a large number of lines that may deliver some inconveniences. It makes sense to limit the length of displayed lines, however, implying that these lines are infinite lines. Highlight the lines that define both the plane and press the key with the number 9. The resulting image is shown in figure below. | |
Рис. 22 |
||
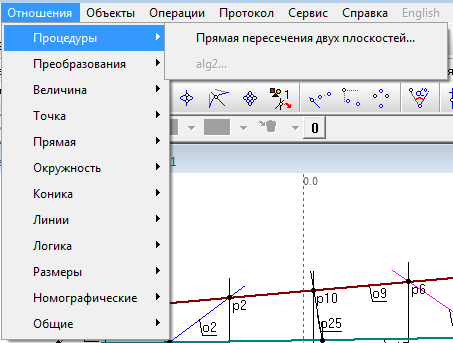
| 23 | Finally, we use previously prepared procedure for constrcting the line of intersection of two given planes. The procedure is called from a menu Relations/Procedures/Line of the intersection of two planes (the active window from which the procedure is called is the window of algorithm alg2). | |
Рис. 23 |
||
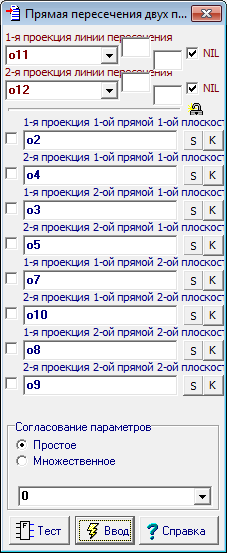
| 24 | The call menu item will cause the dialog box to create a command | |
Рис. 24 |
||
| 25 | Complete the fields in this dialog object names in strict accordance with the procedure established for the parameters of the called procedure: | |
Рис. 25 |
||
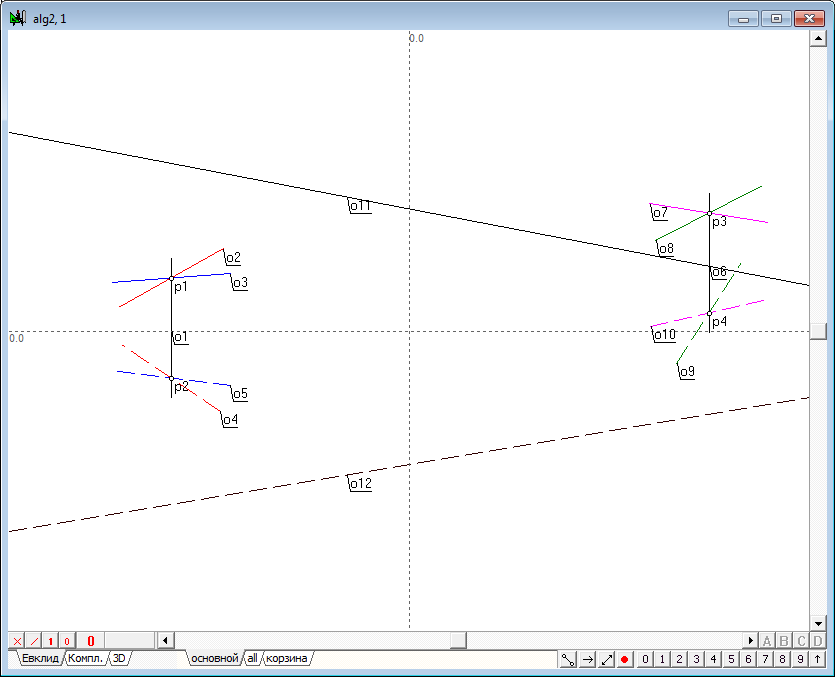
| 26 | After pressing the Enter button will be the solution. The spatial video, the simulated projections o11 and o12 is the result of the intersection of two planes given intersecting straight (o2,o4 ) and ( o3,o5 ) and (o7,o10 ) - (o8,o9 ). Changing , the position of projection of the line, with the assistance of the shaper we will get different solutions to the problem. | |
Рис. 26 |
||
| Пример |
